1.어텐션 메커니즘
* 기존의 RNN(Recurrent Neural Network)이나 LSTM(Long Short-Term Memory) 모델은 입력 데이터를 순차적으로 처리하기 때문에 긴 문장에서 중요한 정보를 잃어버리거나, 멀리 떨어진 단어 간의 관계를 잘 파악하지 못하는 문제가 있었습니다.
* 어텐션은 입력 문장의 모든 단어를 한 번에 보고, 어떤 단어가 중요한지 가중치를 계산하여 집중하는 방법입니다.
* 예를 들어, "나는 오늘 학교에서 수학 시험을 봤다."라는 문장에서 "시험"이라는 단어가 가장 중요한 의미를 가진다고 가정합시다. 어텐션은 이 문장을 처리할 때 "시험"에 더 높은 가중치를 주고, 덜 중요한 단어에는 낮은 가중치를 주는 방식으로 학습합니다.
2. 어텐션 작동원리
어텐션 메커니즘은 크게 쿼리(Query), 키(Key), 값(Value) 세 가지 개념을 이용하여 작동합니다. 이를 도서관에서 책을 빌리는 과정에 비유하여 설명해보겠습니다.
1. 쿼리(Query): "어떤 정보를 찾을까?"
* Query (Q), Key (K), Value (V)를 벡터 형태로 변환
문장을 입력하면 각 단어는 벡터(숫자로 표현된 형태)로 변환됩니다.
* 예를 들어, 도서관에서 "수학 시험 공부에 도움이 되는 책"을 찾고 싶다고 합시다. 여기서 Query는 내가 찾고 싶은 정보(= 수학 관련 책)입니다.
2. 키(Key): "각 책이 어떤 내용과 관련이 있는가?"
도서관의 모든 책에는 각각 키(Key) 값이 있습니다. 어떤 책은 "수학 문제집", 어떤 책은 "역사책", 어떤 책은 "과학 실험서" 등의 키(Key)를 가집니다.
* Query와 Key의 내적(dot product)을 계산하여 얼마나 관련성이 높은지 측정합니다.
* 예를 들어, "시험"이라는 Query가 있을 때, "수학", "학교", "공부" 등의 Key와 비교하여 "수학"이 가장 높은 점수를 받습니다.
3. 값(Value): "책에서 실제로 얻을 수 있는 정보"
* Value는 실제 책의 내용입니다.
* 예를 들어, 수학 문제집에는 수학 문제와 풀이법이 담겨 있고, 역사책에는 역사적인 사건이 담겨 있습니다.
4. 어텐션 가중치 계산: "어떤 책이 가장 관련 있는가?"
* 내가 찾고 싶은 쿼리(Query: 수학 공부)와 각 책의 키(Key: 책의 주제)를 비교하여 관련성이 높은 책을 찾습니다.
* "수학 문제집"이 가장 관련성이 높다면, 어텐션은 이 책에 가장 높은 가중치를 부여합니다.
* 반면, "역사책"과 같은 덜 관련된 책은 낮은 가중치를 받습니다.
* 가중치의 총합이 1이 되도록 소프트맥스 함수를 적용하여 정규화합니다.
5. 결과(출력) 도출: "중요한 정보를 더 많이 반영"
* 어텐션 메커니즘은 가중치가 높은(즉, 관련성이 높은) 책의 내용을 더 많이 반영하여 결과를 생성합니다.
* 즉, 문장에서 가장 중요한 단어에 집중하여, 해당 단어를 기반으로 번역, 요약, 감정 분석 등의 작업을 수행합니다.
* Value(실제 단어의 정보)에 가중치를 곱해서 최종 결과를 만듭니다.
예시 1)
import os
import requests
import zipfile
import torch
import torch.nn as nn
import torch.optim as optim
import random
import re
import unicodedata
from torch.utils.data import Dataset, DataLoader
from collections import Counter
from torch.nn.utils.rnn import pad_sequence

# 데이터 다운로드 및 압축 해제
headers = {
    'User-Agent': 'Mozilla/5.0 (Windows NT 10.0; Win64; x64) AppleWebKit/537.36 (KHTML, like Gecko) Chrome/91.0.4472.124 Safari/537.36'
}

def download_zip(url, output_path):
    """주어진 URL에서 ZIP 파일을 다운로드하는 함수"""
    response = requests.get(url, headers=headers, stream=True)
    if response.status_code == 200:
        with open(output_path, 'wb') as f:
            for chunk in response.iter_content(chunk_size=8192):
                f.write(chunk)
        print(f"ZIP file downloaded to {output_path}")
    else:
        print(f"Failed to download. HTTP Response Code: {response.status_code}")

# 프랑스어-영어 번역 데이터셋 다운로드
url = "http://www.manythings.org/anki/fra-eng.zip"
output_path = "fra-eng.zip"
download_zip(url, output_path)

# 현재 작업 디렉토리 설정
path = os.getcwd()
zipfilename = os.path.join(path, output_path)

# ZIP 파일 압축 해제
with zipfile.ZipFile(zipfilename, 'r') as zip_ref:
    zip_ref.extractall(path)

# 데이터 로드 및 전처리

def unicode_to_ascii(s):
    """유니코드 문자열을 ASCII 형식으로 변환하는 함수"""
    return ''.join(c for c in unicodedata.normalize('NFD', s) if unicodedata.category(c) != 'Mn')

def normalize_string(s):
    """문자열을 소문자로 변환하고 특수문자를 정리하는 함수"""
    s = unicode_to_ascii(s.lower().strip())  # 소문자로 변환 및 공백 제거
    s = re.sub(r"[^a-zA-Z.!?]+", " ", s)  # 영어 알파벳과 일부 특수문자만 유지
    return s

def load_data(filepath, num_samples=50000):
    """파일에서 번역 데이터(프랑스어-영어)를 로드하는 함수"""
    with open(filepath, encoding='utf-8') as f:
        lines = f.read().strip().split("\n")  # 파일을 줄 단위로 읽기
    # 각 줄을 탭 문자로 분할하여 프랑스어-영어 문장 쌍을 저장
    pairs = [[normalize_string(s) for s in l.split('\t')[:2]] for l in lines[:num_samples]]
    return pairs

# 번역 데이터 파일 경로 설정
file_path = os.path.join(path, "fra.txt")
# 데이터 로드 (최대 50,000개 문장 샘플링)
pairs = load_data(file_path, num_samples=50000)

# 단어 사전 생성 클래스
class Lang:
    """문장 내 단어를 인덱스로 변환하는 단어 사전 클래스"""
    def __init__(self):
        # 특수 토큰 설정
        self.word2index = {"<SOS>": 0, "<EOS>": 1, "<PAD>": 2}  # 단어 -> 인덱스 매핑
        self.index2word = {0: "<SOS>", 1: "<EOS>", 2: "<PAD>"}  # 인덱스 -> 단어 매핑
        self.word_count = Counter()  # 단어 빈도수 카운트

    def add_sentence(self, sentence):
        """문장을 단어 단위로 분할하여 단어 빈도수 카운트"""
        for word in sentence.split():
            self.word_count[word] += 1

    def build_vocab(self, min_count=1):
        """최소 등장 횟수(min_count) 이상인 단어만을 포함하여 단어 사전 생성"""
        for word, count in self.word_count.items():
            if count >= min_count:
                index = len(self.word2index)
                self.word2index[word] = index
                self.index2word[index] = word

    def sentence_to_indexes(self, sentence):
        """문장을 단어 인덱스 리스트로 변환"""
        return [self.word2index.get(word, self.word2index['<PAD>']) for word in sentence.split()]

# 프랑스어와 영어를 위한 단어 사전 생성
input_lang = Lang()  # 입력(프랑스어) 단어 사전
target_lang = Lang()  # 출력(영어) 단어 사전

# 문장 내 단어를 사전에 추가
for src, tgt in pairs:
    input_lang.add_sentence(src)
    target_lang.add_sentence(tgt)

# 단어 사전 구축
input_lang.build_vocab()
target_lang.build_vocab()
예시 2)
import torch
from torch.utils.data import Dataset, DataLoader
from torch.nn.utils.rnn import pad_sequence

# 번역 데이터셋 클래스 정의
class TranslationDataset(Dataset):
    def __init__(self, pairs, input_lang, target_lang, max_length=20):
        """
        :param pairs: 번역 문장 쌍 리스트 [(입력문장, 정답문장), ...]
        :param input_lang: 입력 언어 클래스 (단어 -> 인덱스 변환 포함)
        :param target_lang: 대상 언어 클래스
        :param max_length: 최대 문장 길이 (이를 초과하면 자름)
        """
        self.pairs = pairs
        self.input_lang = input_lang
        self.target_lang = target_lang
        self.max_length = max_length

    def __len__(self):
        return len(self.pairs)  # 데이터셋의 총 샘플 수 반환

    def __getitem__(self, idx):
        """
        주어진 인덱스(idx)에 해당하는 입력 문장과 정답 문장을 인덱스 시퀀스로 변환.
        """
        src, tgt = self.pairs[idx]  # 문장 쌍 가져오기

        # 입력 문장을 인덱스로 변환하고, 최대 길이로 자른 후 <EOS> 추가
        src_idx = self.input_lang.sentence_to_indexes(src)[:self.max_length] + [self.input_lang.word2index['<EOS>']]
        tgt_idx = self.target_lang.sentence_to_indexes(tgt)[:self.max_length] + [self.target_lang.word2index['<EOS>']]

        return torch.tensor(src_idx), torch.tensor(tgt_idx)  # 텐서 형태로 반환


# DataLoader의 collate_fn 함수 (배치 내 패딩 처리)
def collate_fn(batch):
    src_batch, tgt_batch = zip(*batch)  # 배치에서 입력과 정답 문장 분리

    # 패딩을 추가하여 배치 크기를 맞춤 (가장 긴 문장을 기준)
    src_batch = pad_sequence(src_batch, batch_first=True, padding_value=input_lang.word2index['<PAD>'])
    tgt_batch = pad_sequence(tgt_batch, batch_first=True, padding_value=target_lang.word2index['<PAD>'])

    return src_batch, tgt_batch  # (batch_size, padded_seq_len)

# 데이터셋 및 DataLoader 생성
dataset = TranslationDataset(pairs, input_lang, target_lang)  # 데이터셋 객체 생성
dataloader = DataLoader(dataset, batch_size=64, shuffle=True, collate_fn=collate_fn)  # DataLoader 구성
예제 3)
import torch
import torch.nn as nn

# 인코더 (Bi-GRU 사용, 기존 구조 유지)
class Encoder(nn.Module):
    def __init__(self, input_size, embedding_size, hidden_size, num_layers=2, dropout=0.3):
        super().__init__()
        self.embedding = nn.Embedding(input_size, embedding_size)  # 단어 임베딩 레이어
        self.rnn = nn.GRU(
            embedding_size, hidden_size, num_layers=num_layers,
            dropout=dropout, batch_first=True, bidirectional=True  # 양방향 GRU 사용
        )
        self.fc = nn.Linear(hidden_size * 2, hidden_size)  # 양방향 GRU의 출력을 결합하여 차원 축소

    def forward(self, x):
        """
        x: (batch, seq_len) 형태의 입력 문장 (단어 인덱스)
        """
        embedded = self.embedding(x)  # (batch, seq_len, embedding_size)
        outputs, hidden = self.rnn(embedded)  # outputs: (batch, seq_len, hidden_size * 2)

        # 양방향 GRU의 마지막 스텝 두 개를 결합하여 hidden 상태로 사용
        hidden = torch.tanh(self.fc(torch.cat((hidden[-2, :, :], hidden[-1, :, :]), dim=1)))  # (batch, hidden_size)

        # 디코더에서 사용할 hidden state 형태로 변환 (num_layers, batch, hidden_size)
        return outputs, hidden.unsqueeze(0).repeat(2, 1, 1)  # (batch, seq_len, hidden_size * 2), (num_layers, batch, hidden_size)


# 어텐션 메커니즘 정의 (Luong 어텐션)
class Attention(nn.Module):
    def __init__(self, hidden_size):
        super().__init__()
        self.attn = nn.Linear(hidden_size * 3, hidden_size)  # 쿼리, 키, 밸류를 조합하는 레이어
        self.v = nn.Linear(hidden_size, 1, bias=False)  # 스칼라 값으로 변환하는 레이어

    def forward(self, decoder_hidden, encoder_outputs):
        """
        decoder_hidden: (batch, hidden_size) - 디코더의 현재 은닉 상태
        encoder_outputs: (batch, seq_len, hidden_size * 2) - 인코더의 모든 출력
        """
        seq_len = encoder_outputs.shape[1]

        # 디코더의 현재 hidden을 seq_len만큼 반복하여 비교
        decoder_hidden_expanded = decoder_hidden.unsqueeze(1).repeat(1, seq_len, 1)  # (batch, seq_len, hidden_size)

        # 어텐션 점수 계산 (batch, seq_len, hidden_size) -> (batch, seq_len, 1)
        energy = torch.tanh(self.attn(torch.cat((decoder_hidden_expanded, encoder_outputs), dim=2)))
        attention_weights = torch.softmax(self.v(energy).squeeze(2), dim=1)  # (batch, seq_len)

        # 어텐션 가중합 적용하여 context 벡터 생성
        attn_context = torch.bmm(attention_weights.unsqueeze(1), encoder_outputs).squeeze(1)  # (batch, hidden_size * 2)

        return attn_context, attention_weights  # (batch, hidden_size * 2), (batch, seq_len)


# 디코더 (어텐션 적용)
class Decoder(nn.Module):
    def __init__(self, output_size, embedding_size, hidden_size, num_layers=2, dropout=0.3):
        super().__init__()
        self.embedding = nn.Embedding(output_size, embedding_size)  # 단어 임베딩 레이어
        self.attention = Attention(hidden_size)  # 어텐션 모듈

        # 디코더 RNN: 입력 크기는 (임베딩 + 어텐션 컨텍스트)
        self.rnn = nn.GRU(
            embedding_size + hidden_size * 2, hidden_size,
            num_layers=num_layers, dropout=dropout, batch_first=True
        )

        # 출력 레이어 (어텐션 컨텍스트 포함하여 hidden_size * 3 크기)
        self.fc = nn.Linear(hidden_size * 3, output_size)

    def forward(self, x, hidden, encoder_outputs):
        """
        x: (batch,) - 이전 시점에서 예측한 단어의 인덱스
        hidden: (num_layers, batch, hidden_size) - 이전 디코더 은닉 상태
        encoder_outputs: (batch, seq_len, hidden_size * 2) - 인코더의 모든 출력
        """
        x = x.unsqueeze(1)  # (batch, 1) - 시퀀스 차원 추가
        embedded = self.embedding(x)  # (batch, 1, embedding_size)

        # 어텐션 적용하여 컨텍스트 벡터 생성
        attn_context, attn_weights = self.attention(hidden[-1], encoder_outputs)  # (batch, hidden_size * 2)

        # RNN 입력 생성 (현재 임베딩 + 어텐션 컨텍스트)
        rnn_input = torch.cat((embedded, attn_context.unsqueeze(1)), dim=2)  # (batch, 1, embedding_size + hidden_size * 2)

        # RNN 실행
        output, hidden = self.rnn(rnn_input, hidden)  # output: (batch, 1, hidden_size)

        # 출력 벡터에 어텐션 컨텍스트 추가하여 최종 예측 수행
        output = torch.cat((output.squeeze(1), attn_context), dim=1)  # (batch, hidden_size * 3)
        prediction = self.fc(output)  # (batch, output_size)

        # <PAD> 단어가 예측되지 않도록 큰 음수값을 부여
        prediction[:, target_lang.word2index["<PAD>"]] -= 100

        return prediction, hidden, attn_weights  # (batch, output_size), (num_layers, batch, hidden_size), (batch, seq_len)
예제 4)
import torch
import random

# 학습 함수
def train(encoder, decoder, dataloader, optimizer, criterion, device, num_epochs=50, teacher_forcing_ratio=0.7):
    for epoch in range(num_epochs):  # 설정된 epoch만큼 반복
        total_loss = 0  # 에폭별 총 손실을 저장할 변수

        for src, tgt in dataloader:  # 배치 단위로 학습 진행
            src, tgt = src.to(device), tgt.to(device)  # 입력 데이터를 장치(device: CPU/GPU)로 이동
            optimizer.zero_grad()  # 이전 단계의 기울기 초기화

            # 인코더에 입력 시퀀스를 전달하여 컨텍스트 벡터 및 히든 상태 얻기
            encoder_outputs, encoder_hidden = encoder(src)

            # 디코더의 첫 입력을 <SOS> 토큰으로 설정
            decoder_input = torch.tensor([target_lang.word2index['<SOS>']] * src.shape[0], device=device)

            # 디코더의 초기 은닉 상태를 인코더의 마지막 은닉 상태로 설정
            decoder_hidden = encoder_hidden
            loss = 0  # 배치 단위 손실 초기화

            # 번역된 정답 문장의 길이만큼 반복
            for t in range(tgt.shape[1]):
                # 디코더에 입력을 전달하여 단어 예측
                output, decoder_hidden, _ = decoder(decoder_input, decoder_hidden, encoder_outputs)

                # `output` : 예측된 단어의 확률 분포, `tgt[:, t]` : 실제 정답 단어의 인덱스
                loss += criterion(output, tgt[:, t])  # 손실 계산

                # 일정 확률(teacher forcing ratio)에 따라 정답을 다음 입력으로 사용
                teacher_force = random.random() < teacher_forcing_ratio
                decoder_input = tgt[:, t] if teacher_force else output.argmax(1)  # 정답 or 예측값 중 선택하여 다음 입력으로 설정

            # 역전파를 수행하여 기울기 계산 후, 가중치 업데이트
            loss.backward()
            optimizer.step()
            total_loss += loss.item()  # 총 손실값 업데이트

        # 에폭이 끝날 때 평균 손실 출력
        print(f"Epoch {epoch+1}, Loss: {total_loss / len(dataloader)}")
예제 5)
import torch
import torch.optim as optim
import torch.nn as nn

# 학습을 수행할 디바이스 설정 (GPU 사용 가능하면 GPU, 아니면 CPU)
device = torch.device("cuda" if torch.cuda.is_available() else "cpu")

# 인코더 및 디코더 모델 초기화
encoder = Encoder(len(input_lang.word2index), 512, 512).to(device)  # 입력 단어 사전 크기, 임베딩 크기, 히든 크기
decoder = Decoder(len(target_lang.word2index), 512, 512).to(device)  # 출력 단어 사전 크기, 임베딩 크기, 히든 크기

# 옵티마이저 설정 (Adam 사용, 인코더와 디코더의 모든 파라미터 업데이트)
optimizer = optim.Adam(list(encoder.parameters()) + list(decoder.parameters()), lr=0.0001)

# 손실 함수 설정 (패딩 토큰 "<PAD>"의 손실은 무시)
criterion = nn.CrossEntropyLoss(ignore_index=target_lang.word2index["<PAD>"])

# 모델 학습 실행 (에폭 수: 100)
train(encoder, decoder, dataloader, optimizer, criterion, device, num_epochs=100)
--->
Epoch 1, Loss: 37.913817752047876
Epoch 2, Loss: 28.518865512155205
Epoch 3, Loss: 23.5558197723935
Epoch 4, Loss: 19.966340168662693
Epoch 5, Loss: 16.93499421341645
Epoch 6, Loss: 14.511216703888095
Epoch 7, Loss: 12.836640837247414
Epoch 8, Loss: 11.132847658508574
Epoch 9, Loss: 9.898197663104748
Epoch 10, Loss: 8.83085610677519
Epoch 11, Loss: 7.906107213491064
Epoch 12, Loss: 7.259495363820849
Epoch 13, Loss: 6.595065499815489
Epoch 14, Loss: 6.122033141153243
Epoch 15, Loss: 5.70172247465919
Epoch 16, Loss: 5.254775060717102
Epoch 17, Loss: 4.839549010976806
Epoch 18, Loss: 4.572370346549832
Epoch 19, Loss: 4.365182961649297
Epoch 20, Loss: 4.03091463926808
Epoch 21, Loss: 3.844006985044845
Epoch 22, Loss: 3.6817682734535784
Epoch 23, Loss: 3.503050041625567
Epoch 24, Loss: 3.37078911630089
Epoch 25, Loss: 3.233816698384102
Epoch 26, Loss: 3.0594179403141637
Epoch 27, Loss: 3.0778542886609617
Epoch 28, Loss: 2.8667395520393195
Epoch 29, Loss: 2.8255197399717464
Epoch 30, Loss: 2.7593423658624636
Epoch 31, Loss: 2.6946506774638923
Epoch 32, Loss: 2.6349897582817565
Epoch 33, Loss: 2.535195388147593
Epoch 34, Loss: 2.492914144797703
Epoch 35, Loss: 2.4610465255844622
Epoch 36, Loss: 2.4169276621945373
Epoch 37, Loss: 2.3334289276996234
Epoch 38, Loss: 2.289165935095619
Epoch 39, Loss: 2.319170239788797
Epoch 40, Loss: 2.293713774522552
Epoch 41, Loss: 2.3066565025493007
Epoch 42, Loss: 2.289293072717574
Epoch 43, Loss: 2.1909140656366373
Epoch 44, Loss: 2.2036848745077773
Epoch 45, Loss: 2.195265454785598
Epoch 46, Loss: 2.126802709401416
Epoch 47, Loss: 2.1283584490151664
Epoch 48, Loss: 2.135831368777453
Epoch 49, Loss: 2.071985088955716
Epoch 50, Loss: 2.037787004809855
Epoch 51, Loss: 2.1081978747302004
Epoch 52, Loss: 2.0883078209274566
Epoch 53, Loss: 2.0288233437654
Epoch 54, Loss: 2.0509576032228787
Epoch 55, Loss: 2.05561538044449
Epoch 56, Loss: 2.1364424254583274
Epoch 57, Loss: 2.0330447800019207
Epoch 58, Loss: 1.998819298756397
Epoch 59, Loss: 2.0437555032617905
Epoch 60, Loss: 2.0100582328141496
Epoch 61, Loss: 1.9900325781396588
Epoch 62, Loss: 1.966947505160061
Epoch 63, Loss: 2.0349114364217917
Epoch 64, Loss: 1.973283686448851
Epoch 65, Loss: 1.9634530102962728
Epoch 66, Loss: 1.9814024197171107
Epoch 67, Loss: 1.9581342564366968
Epoch 68, Loss: 1.9143444463572539
Epoch 69, Loss: 1.8858095533250239
Epoch 70, Loss: 1.9238469014539743
Epoch 71, Loss: 1.8871724591078356
Epoch 72, Loss: 1.9432170108303695
Epoch 73, Loss: 1.9819257979655205
Epoch 74, Loss: 1.8896992950488234
Epoch 75, Loss: 1.9288621688895213
Epoch 76, Loss: 1.8945707069790882
Epoch 77, Loss: 1.8950314495874487
Epoch 78, Loss: 1.8865668801852808
Epoch 79, Loss: 1.8612295174995042
Epoch 80, Loss: 1.8551639249105283
Epoch 81, Loss: 1.899167507429562
Epoch 82, Loss: 1.8742192008763627
Epoch 83, Loss: 1.8744094980037427
Epoch 84, Loss: 1.874353427487566
Epoch 85, Loss: 1.804183767732147
Epoch 86, Loss: 1.8564720436587663
Epoch 87, Loss: 1.8738319846370337
Epoch 88, Loss: 1.8736898536267488
Epoch 89, Loss: 1.7959630189801725
Epoch 90, Loss: 1.8206855074676407
Epoch 91, Loss: 1.8096142750414437
Epoch 92, Loss: 1.8217020763460632
Epoch 93, Loss: 1.8322375037938432
Epoch 94, Loss: 1.821858340288367
Epoch 95, Loss: 1.8043226945735609
Epoch 96, Loss: 1.8052131645667278
Epoch 97, Loss: 1.831234719289843
Epoch 98, Loss: 1.823136513190501
Epoch 99, Loss: 1.8209420890759325
Epoch 100, Loss: 1.7760930686350673
예제 6)
import matplotlib.pyplot as plt
import numpy as np
import torch
# 어텐션을 활용한 문장 번역 함수
def translate_sentence_with_attention(sentence, encoder, decoder, input_lang, target_lang, device, max_length=30, min_length=5):
encoder.eval() # 인코더를 평가 모드로 설정 (학습 중이 아님)
decoder.eval() # 디코더를 평가 모드로 설정
with torch.no_grad(): # 기울기 계산 비활성화 (추론 시 필요 없음)
# 입력 문장을 단어 인덱스 리스트로 변환하고 <EOS> 토큰 추가
src_idx = input_lang.sentence_to_indexes(sentence) + [input_lang.word2index['<EOS>']]
src_tensor = torch.tensor(src_idx, device=device).unsqueeze(0) # (1, 문장 길이) 형태로 변환
# 인코더 실행 (입력 시퀀스를 인코더에 통과시켜 컨텍스트 벡터 생성)
encoder_outputs, encoder_hidden = encoder(src_tensor)
# 디코더 초기 설정
decoder_input = torch.tensor([target_lang.word2index['<SOS>']], device=device) # 디코더 첫 입력은 <SOS> 토큰
decoder_hidden = encoder_hidden # 인코더의 마지막 은닉 상태를 디코더의 초기 은닉 상태로 설정
translated_sentence = [] # 번역된 문장을 저장할 리스트
attention_weights_list = [] # 어텐션 가중치 저장 리스트
# 최대 길이(max_length)까지 단어 생성 반복
for _ in range(max_length):
output, decoder_hidden, attn_weights = decoder(decoder_input, decoder_hidden, encoder_outputs)
top_word_idx = output.argmax(1).item() # 가장 확률이 높은 단어 인덱스 선택
# <PAD> 토큰이 나오면 무시 (문장 중간에 발생 가능)
if top_word_idx == target_lang.word2index["<PAD>"]:
continue
# 최소 길이(min_length) 이상 생성된 경우에만 <EOS> 만나면 종료
if top_word_idx == target_lang.word2index["<EOS>"] and len(translated_sentence) >= min_length:
break
# 어텐션 가중치 저장 (배치 차원 제거 후 NumPy 배열로 변환)
attention_weights_list.append(attn_weights.squeeze(0).cpu().numpy())
# 번역된 단어 추가
translated_sentence.append(target_lang.index2word[top_word_idx])
# 다음 디코더 입력을 현재 예측된 단어로 설정
decoder_input = torch.tensor([top_word_idx], device=device)
# 어텐션 가중치 리스트를 NumPy 배열로 변환 후 반환
return translated_sentence, np.array(attention_weights_list), src_idx
# 어텐션 가중치를 시각화하는 함수
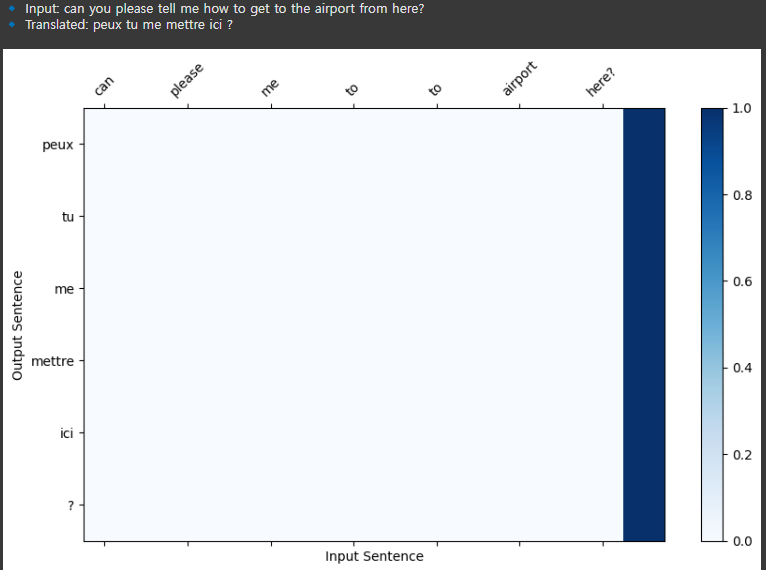
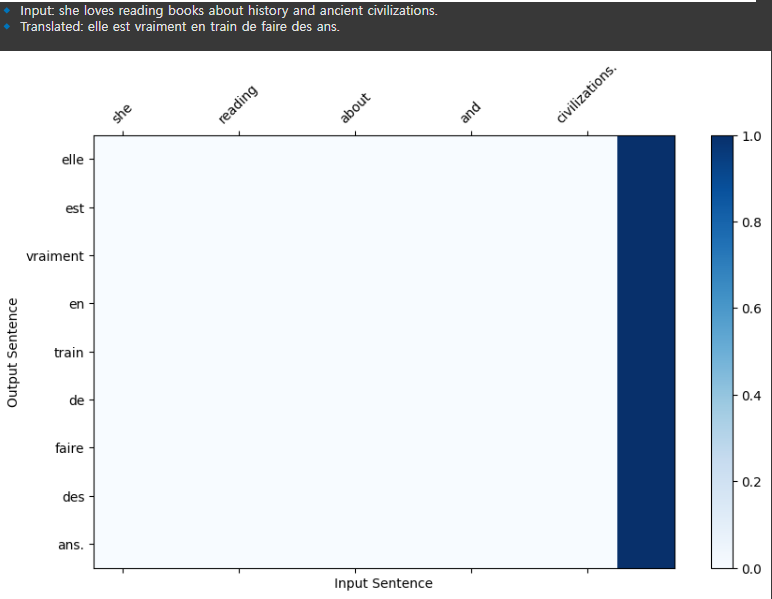
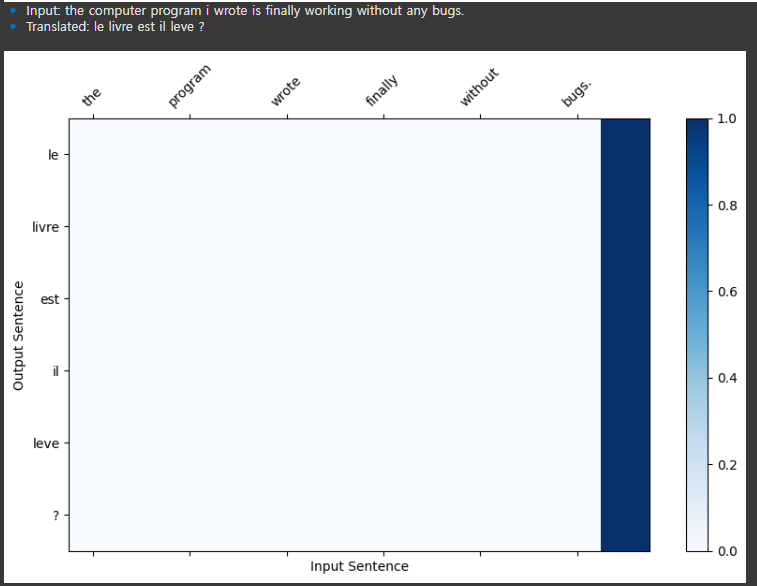
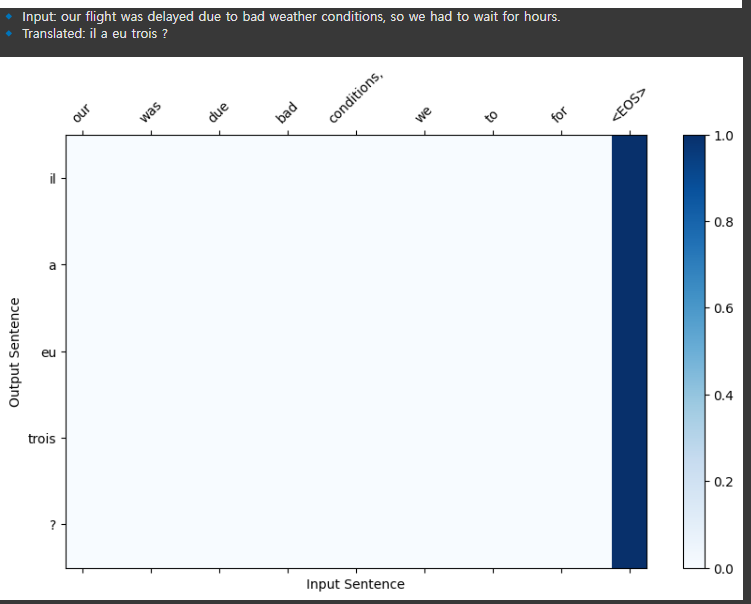
def plot_attention(attention_weights, input_sentence, output_sentence):
fig, ax = plt.subplots(figsize=(10, 6)) # 그림과 축 생성
# 입력 및 출력 문장 리스트 생성 (각 단어 + "<EOS>" 추가)
input_words = input_sentence.split() + ["<EOS>"]
output_words = output_sentence + ["<EOS>"]
# 어텐션 가중치를 히트맵으로 시각화
ax.matshow(attention_weights, cmap='Blues', aspect='auto')
# x축과 y축에 단어 설정
ax.set_xticks(range(len(input_words)))
ax.set_xticklabels(input_words, rotation=45) # 45도 회전하여 가독성 향상
ax.set_yticks(range(len(output_words)))
ax.set_yticklabels(output_words)
# 색상 바 추가하여 가중치 크기 시각화
plt.colorbar(ax.matshow(attention_weights, cmap='Blues', aspect='auto'))
plt.xlabel("Input Sentence") # x축 라벨 설정
plt.ylabel("Output Sentence") # y축 라벨 설정
plt.show() # 그래프 출력
예제 7)
# 테스트할 문장 리스트
test_sentences = [
    "i love you so much because you are always kind to me.",
    "where is the nearest train station? i need to catch a train.",
    "i am studying artificial intelligence and deep learning these days.",
    "this restaurant serves the best pasta i have ever had in my life.",
    "the weather is beautiful today, so we decided to go for a walk in the park.",
    "i have a meeting tomorrow morning at 9 am, so i need to sleep early tonight.",
    "can you please tell me how to get to the airport from here?",
    "she loves reading books about history and ancient civilizations.",
    "the computer program i wrote is finally working without any bugs.",
    "our flight was delayed due to bad weather conditions, so we had to wait for hours."
]

# 여러 문장을 번역하고 결과 출력
for sentence in test_sentences:
    # 번역 실행 (어텐션 정보 포함)
    translated_sentence, attention_weights, src_idx = translate_sentence_with_attention(
        sentence, encoder, decoder, input_lang, target_lang, device
    )

    # 입력 문장과 번역된 문장 출력
    print(f"🔹 Input: {sentence}")  # 원본 문장 출력
    print(f"🔹 Translated: {' '.join(translated_sentence)}\n")  # 번역된 문장 출력

    # 어텐션 가중치 시각화
    plot_attention(attention_weights, sentence, translated_sentence)
-->
--->
--->

--->

--->
-->

-->
-->
--->
--->
예제 8)
import torch

# 모델 가중치 및 옵티마이저 상태 저장
torch.save({
    'encoder_state_dict': encoder.state_dict(),  # 인코더의 학습된 가중치 저장
    'decoder_state_dict': decoder.state_dict(),  # 디코더의 학습된 가중치 저장
    'optimizer_state_dict': optimizer.state_dict(),  # 옵티마이저(Adam 등)의 현재 상태 저장
}, 'seq2seq_attention.pth')  # 저장 파일명 (확장자는 .pth 또는 .pt 사용)
예제 9)
import torch

# 저장된 모델 가중치 및 옵티마이저 상태 로드
checkpoint = torch.load('seq2seq_attention.pth', map_location=device)  # 파일을 로드하고, 지정된 `device`로 이동

# 로드한 가중치를 모델에 적용
encoder.load_state_dict(checkpoint['encoder_state_dict'])  # 인코더 가중치 로드
decoder.load_state_dict(checkpoint['decoder_state_dict'])  # 디코더 가중치 로드
optimizer.load_state_dict(checkpoint['optimizer_state_dict'])  # 옵티마이저 상태 로드
결과적으로 해석은 잘 나오지않지만 잘나오게 할려면 epochs를 많이주면 된다.
'자연어 처리 > 자연어 처리' 카테고리의 다른 글
| 12. 사전 학습된 언어 모델(PML) (2) | 2025.02.13 |
|---|---|
| 11. 트랜스포머 (2) | 2025.02.12 |
| 8. Seq2Seq (0) | 2025.02.11 |
| 7. LSTM과 GRU (0) | 2025.02.10 |
| 6-2. RNN 활용 (0) | 2025.02.10 |